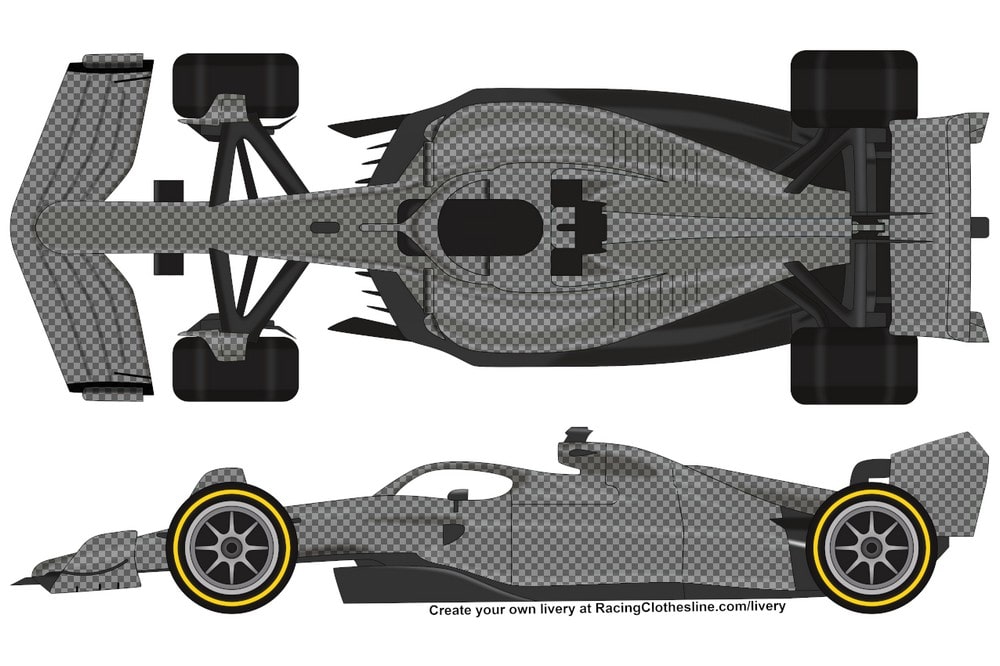
The new Formula One season is fast approaching and the excitement is building as fans are eager to catch a glimpse of the new cars. This year, we’ve created a special custom livery template that fellow F1 enthusiasts can use to create their own liveries!
Whether you want to predict a team’s upcoming livery, show how much better your favourite team’s car could look with you leading the team, or design your own fantasy team, our template will help you unleash your creativity.
This template can be downloaded for free and used in any image editing software. To get started, follow the steps below for more information on how to use this template:
To get started, it’s recommended that you download the free open-source image editor GIMP from the official website. This will allow you to open and edit the template file that we have provided.
If you’d rather use some other image editor, you can skip to the “Using another editing software” section of this article.
Next, download the free template file that we have created and open it in GIMP. You can download the template by clicking the button below. Once you have saved the file to your computer, you can double-click on it to open it in GIMP.
Our template comes with five different tyre compounds to choose from: soft, medium, hard, intermediate, and wet. On the left sidebar, you should see a Layers panel. If you don’t see this panel, click Windows > Dockable Dialogs > Layers on the top of your screen.
In the Layers panel, you should see a Template layer. This layer can be expanded using the small + button next to the layer preview image. When you expand the Template layer you should then see the Tyres layer which can be expanded to show all five of the tyre compounds.
To change the visible tyre compound, click the Eye icon to hide the currently selected tyre compound and then press the same button on the tyre compound you want to use.
Now it’s time for the best part: creating your livery!
To do this, expand the Livery layer and click the Base layer. This ensures that you are only editing the livery, not the car template. Now you can paint your car however you like it. GIMP includes a variety of tools to edit your livery.
You can also add your images to the car by dragging and dropping them into the GIMP window. Any images you add will appear as a new layer in the Layer panel. If the image appears on top of the car template, drag the image layer to the bottom of the Layers panel.
The most important part of this step is to have fun!
Once you’ve created your masterpiece, it’s time to save it so that you can share it with all of your friends. To do this, click File > Export As… and pick where you want to save your livery. Make sure that you have included .png at the end of your name so that it’s properly saved as an image.
Now that you have your livery saved as an image, you can share it wherever you like! Tag us on social media. We’d love to see your creation!
We do ask that you please keep the text on the image with the link to this page. This will help other people who come across your stunning custom livery find the template so they can try it themselves.
Not a fan of GIMP? No problem!
There are countless image editing programs available to use. If you want to use another image editor, you can download each template as a plain image using the links below:
These images can easily be imported into any image editor. For the best experience, it’s recommended to use an image editor that supports layers, so you can add your livery below the template.
If you’d rather take a page from Adrian Newey’s playbook and draw your livery by hand, the above livery template images can also be printed.